Follow me on Pinterest

Follow Me on Pinterest

Saturday 8 November 2014

Happy Helpers

My class recently went on our big excursion to the Zoo. Parent helpers were invited to take a small group around the Zoo. I decided to thank them with this little 'thank you' gift: 


I bought a little garden shovel and made a card that said 'We dig you! Love Mrs Steffensons class'... I also laminated a photo of the class at the Zoo and attached it to the shovel and card. I had such lovely feedback from the parents that received them.

I'm back...

Wow! What a few months.... I have just returned from the most incredible around the world honeymoon after two amazing weddings!! That's right, two weddings! I married the love of my life Matthew Steffenson on the 30th of August in Sydney, Australia. One day later we flew to the USA (with a little "mini moon" break in Hawaii, USA for two days) flying onto Minnesota, USA for our second wedding reception! After honeymooning to London, Scotland, France, Germany, Italy, Prague and Dubai we flew back to Australia and the next day I started teaching again! I missed my gorgeous students, it was lovely to see their smiling faces again! I am no longer Miss West and am now Mrs Steffenson, something that has taken a little while to get used to!

We have been busily learning new things and creating lots of memories. Here are a couple of the new ideas I have had:
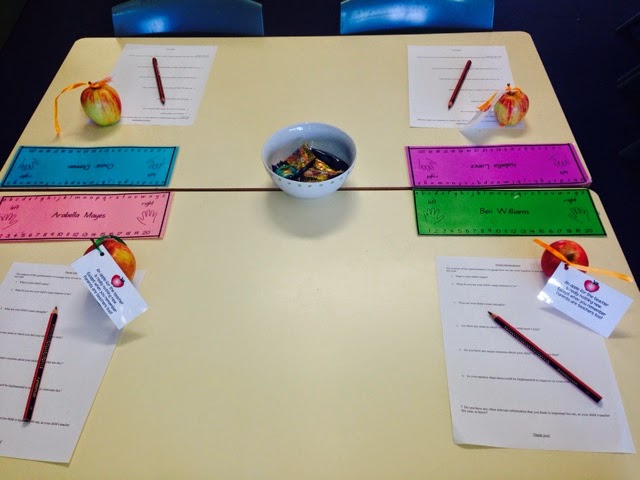
I recently acquired some Kinetic Sand, so I decided to incorporate it into my Literacy Groups. Students loved the unique idea and feeling the texture of the sand... The activity included digging for sight words in a tub of sand and putting them into alphabetical order. They then had their own individual container of sand (old video boxes) and used a pencil to write sight words (at their own ability level) into the sand. When students got a word correct, they put a counter into a cup at the end of the Literacy group rotation the student with the most counters (words correct) was the winner! 

Tuesday 10 June 2014

The Little Red Hen

This term we are placing focus on Nursery Rhymes and Fairy Tales. We have been reading about The Little Red Hen this week. Have a look at our creations!
Photo showing table set up with pre-made example for children to view. 
All that was required was a half circle (I used half a paper plate and traced around this), one circle (I traced the bottom of a large coffee mug) two hand prints (traced my own), goggle eyes and yellow card stick with triangles for beak and pre-drawn cockerel. Stick together and voila a little red hen!

Thursday 8 May 2014

Which witch is which?

This week we have been learning the 'w' sound in class. 

Today we created witches using a basic body outline template on white card paper, a dress template on purple paper, yellow sticky notes and paddle pop sticks. 

Children cut out the purple dresses and stuck them onto the witches body. They then coloured in the face, neck, arms and socks with pencil. The stars on the dress were done with a yellow oil pastel. 

I cut thin strips of paper from post-it notes for the hair and the bristles on the broom. 

The broom handle was made out of coloured paddle pops. Tomorrow the children will write a story about their witch. 


Tuesday 6 May 2014

Mothers Day!

The children in my class have been enjoying making gifts for Mothers Day. Here are some samples of our clever creations!

Fingerprint Poem Bookmark
I found the poem below through a google search.
"My dirty little fingerprints
I've left on every wall,
And on the drawers and table tops,
I've really marked them all.
But here is one that won't rub off,
I'm giving it to you,
Because I'm thankful for a just like you!"
I then used an ink pad for children to print their thumbs on the page. Thy then wrote "Love (and their name)". I will be laminating these and putting a hole at the top with a ribbon tied to it for a bookmark for mum.
Flower Card/ Gift Tags
Very simple, but cute! Draw or source a flower template, use Microsoft word art for the bubble writing effect. Type inside the flower "If mums were flowers I'd pick you!". Children then trace inside the letters with texta. Then turn over the card and place a paddy cake pan in the middle for the flower bulb and have the children write "Love (and their name)".
Wind Chime
Okay, so we cheated a little bit here and bought the wind chimes from a craft store. Children painted and then applied the 'gems' with glue. They turned out nicely, don't you think!

All wrapped up and ready to send home!

A big Happy Mothers Day to all the mums out there!

Friday 2 May 2014

Warm and Fuzzy Inside <3

Warm and Fuzzy
I have just been reflecting on my class this year and thinking about how far they have come since the beginning of the year. I was also thinking about how far they will go in the coming months on their way to graduating Kindergarten and moving on to Year 1. I came across these amazing writing samples from my students last year that I simply had to share!

Students wrote in their Kindergarten writing book for the final time and their task was to write about their favourite part of Kindergarten...

 I promise in the photos to follow that NO form of bribery was used in their written responses:


These truly make me happy...


Christmas! Christmas! Christmas!


I know what your thinking... Gee golly-gosh she is a little bit late or maybe waaaaaaay to early to be thinking about Christmas! I found these little beauties and realised I hadn't posted them on the blog and they were too good not to share (if I do say so myself).

Christmas Elves!
These are a great activity for writing! Students had to name their Elf and write about its job as Santa's helper. All you need to make it is:  
1 speech bubble template (lines give extra structure)
1 Christmas tree shape for hat (glitter, sequence and a pipe cleaner to decorate)  
1 Elf almost like a pudding with legs.
(See photos below).

Paper Bag Reindeer.
What you will need:
Paper bag, painted brown, facial parts templates and children to trace their hands on brown paper for antlers. Cover with glitter for a little extra Christmas sparkle. 
Snowman
Snowman template found on google, goggle eyes, cotton wool for snow, ribbon around the neck for the scarf and pom-poms for buttons.

Santa Stuck In The Chimney
Students were learning the song "When Santa Got Stuck In The Chimney" so I was inspired to make this. I drew the chimney, rectangle shape and added some messy bricks, then drew two separate legs with boots at the bottom. Children coloured both and then attached them. After, they put cotton wool on the top of the chimney and on the top of Santa's boots.   


Christmas Cards 
We made these little cards and they turned out nicely! Draw a wavy/squiggly line on the page and add little light globe holders to the line. Children then use their fingers in coloured paint to create christmas lights!


Christmas Bear 
I drew the template for a bear on A3 and had the children stick red and green paper that I had cut up on the bear. It gave it a nice, bright texture


Letters From Santa
Children wrote letters to Santa, which I "sent" to the North Pole. The children's eyes lit up when they returned to the classroom frozen solid in ice. Easy to do, just stick the letters from Santa in a zip lock bag, fill a container with water and FREEZE! I then had to break the ice all the way from the North Pole in front of them to get Santa's reply letters out (which they thought was the most exciting thing in the world)!


Parent/Teacher Information Evening


To "break the ice" on Parent Teacher night I make these little (healthy) treats for the parents.

To make them I buy enough apples for each parent. Then make up little cards with the words "An apple for the teacher is really nothing new, except when you remember parents are teachers too"! I then laminate and cut the cards out. After, I hole punch the corner and tie a ribbon from the card to the apple. Make sure you buy apples with stalks, this gives you something to tie the ribbon onto.
You will also see on the table a piece of paper and a pencil under the apples. This paper is a questionnaire for parents to fill in with questions that will provide "extra" information about their child. This will assist me in the classroom setting and provides them with an opportunity to share information with me about their child that I may or may not know. 

Thursday 1 May 2014

"J" sound Jack In The Boxes

This week we have been learning the sound "j". We made Jack In The Boxes for craft. They turned out great! Very simple and effective too. 
Clown template was found from a Google search, A4 coloured card paper cut in half for the box and then card paper folded for the spring. I had some A4 glitter paper which I cut into strips for the box ribbon effect. Fluro oil pastels were used for the clown faces.

Tuesday 29 April 2014

Elmer the Elephant

After reading the story Elmer the Elephant to my class, we created these lovely patchwork elephants. I think they turned out nicely!

Umbrella People

These lovely umbrella people were a wonderful way to introduce the sound "u" in the classroom. They are simple but effective. A triangle shape for the body, umbrella shape on top and two legs at the bottom. Children used oil pastels for the colour and glitter for the rain.

First Day Back- Term 2

First Day Back Term 2- My school holidays were a "hoot"... Children wrote a recount of their holidays on A4 lined paper. I then created a template for an owl which they cut out and stuck on to their writing. Grey paper was folded and stuck to create fluffy feathers and blue paddy cake tins were used for the eyes. 

The Easter Bunny Visits


My gorgeous little class were do very excited about the arrival of the Easter Bunny in our classroom. The Easter Bunny, left the children eggs in their own hand-made baskets.

A foot print trail around the room (made out of chalk the night before) was very effective and marshmallow bunny tails left as gifts were enjoyed.
They children enjoyed an Easter Egg hunt in the playground and making Easter Bunnies in craft out of paper bags.

Wednesday 12 February 2014

Valentines Day

I am excited to give these Valentines Day Lollipop flowers to my class on Friday the 14th. Very simple, but effective flower template with message and lollipop pushed through the centre. 

My students created these very simple and cost effective Valentines Day bookmarks. I picked up these paint sample cards from the local hardware store, hole punched the top and tied a ribbon onto them. The children then added glitter to them. 
My students enjoyed making these Valentines Day Heart people. Easy and effective!